
KMK NEWSLETTER
AUGUST 2025
GSX BALL DOOR REBUILD
One of the key items to keep in tip-top shape are the ball doors on your GSX machines. Worn parts and adjustments that are at the maximum are indicators that it is time to rebuild the ball doors.
The ball door condition and adjustments are critical to allow balls to exit the pit and prevent pins from entering the accelerator area.
Always remove power from both machines before doing any service work. If possible lower the sweeps to prevent any wayward balls from entering the pit.
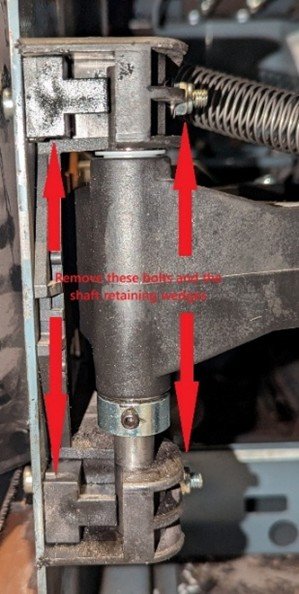
1. Remove the ball door closing springs as shown in this photo.

2. Remove the bolts shown in this photo and pull the wedges rearward to remove them.
Slide the shaft towards the ball box frame and remove the ball door from the machine. With the ball doors removed, it is a great time to visually inspect the accelerator and check for pins that have been pushed under the flat gutters.
3. With the door on a workbench, start by cleaning the entire door.

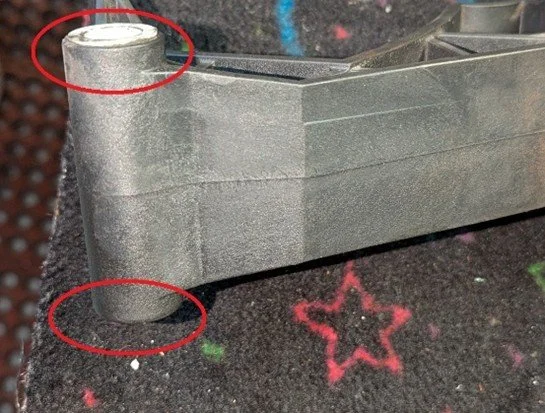
4. Check the 4 bolts in the picture below for tightness.

5. Replace the flanged bushings and lubricate according to the manufacturer’s specifications.
6. Remove the Phillips retaining screw and slide the pivot shaft out. Inspect all pivot points and lubricate to manufacturer’s specifications. Worn parts can be replace with Strike Maker part numbers:
SM-47-031822-004 Ball Door Stop Lever
SM-47-031055-003 Ball Door Key R.H.
SM-47-031056-003 Ball Door Key L.H.
7. Reinstall the ball door and closing spring. Adjust using the stop collar on the shaft to center the door in the opening (Adjustment number 6 in the manual).
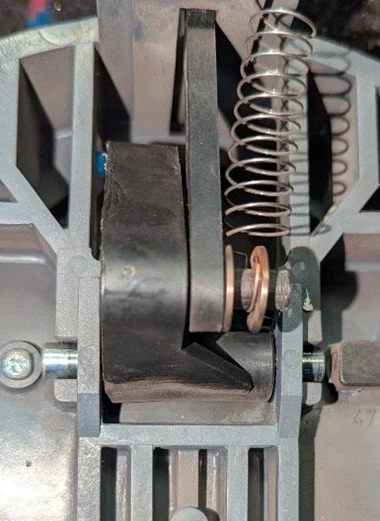
After reinstalling the ball door, you should adjust the ball cushion. Use a lightweight ball when doing the adjustments (Adjustment number 4 in the manual) The ball must be centered with the ball door to allow the ball to enter the accelerator properly. This will also allow the ball to fully depress the key on the ball door. Inspect the cushion adjustment rubber bumper and impact strips for wear before adjusting the cushion front to back.
Adjust the ball door lock to ensure that the locking bolt engages the ball door stop. (Adjustment number 7 in the manual) Inspect and lube the locking mechanism. Double check the electrical connections going to the locking solenoids.
With all the ball return components adjusted and lubricated, balls should roll easily through the ball door. The door when locked, will prevent pins from entering the accelerator.
Spend a little time on this critical area of your machines. It will make life easier for you and your customers.
What’s new on kmk
Flow Charts

7 PIN ADS ERROR

10 PIN ADS ERROR
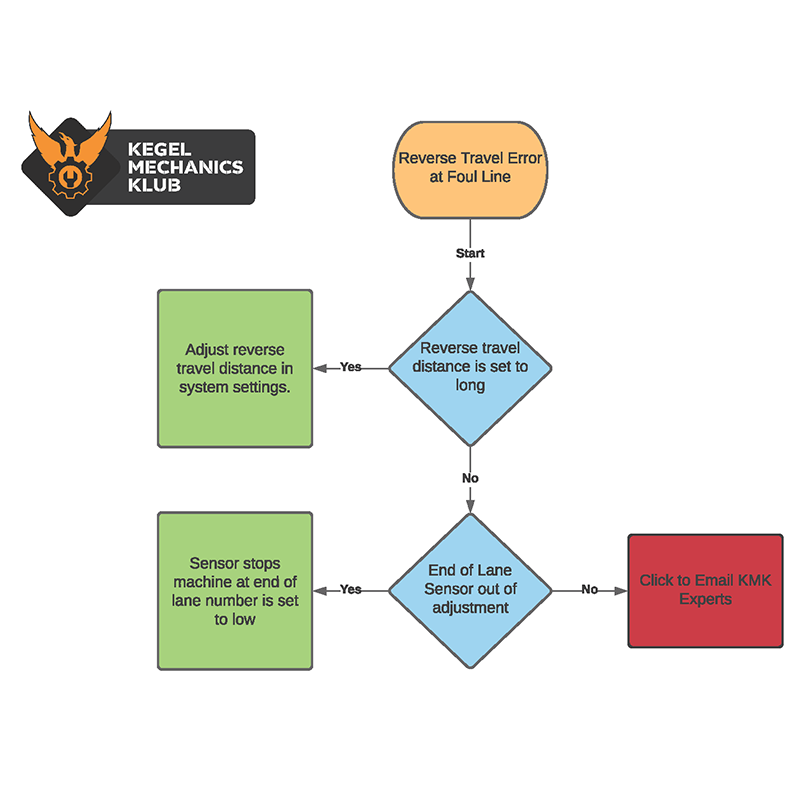
REVERSE TRAVEL ERROR AT THE FOUL LINE
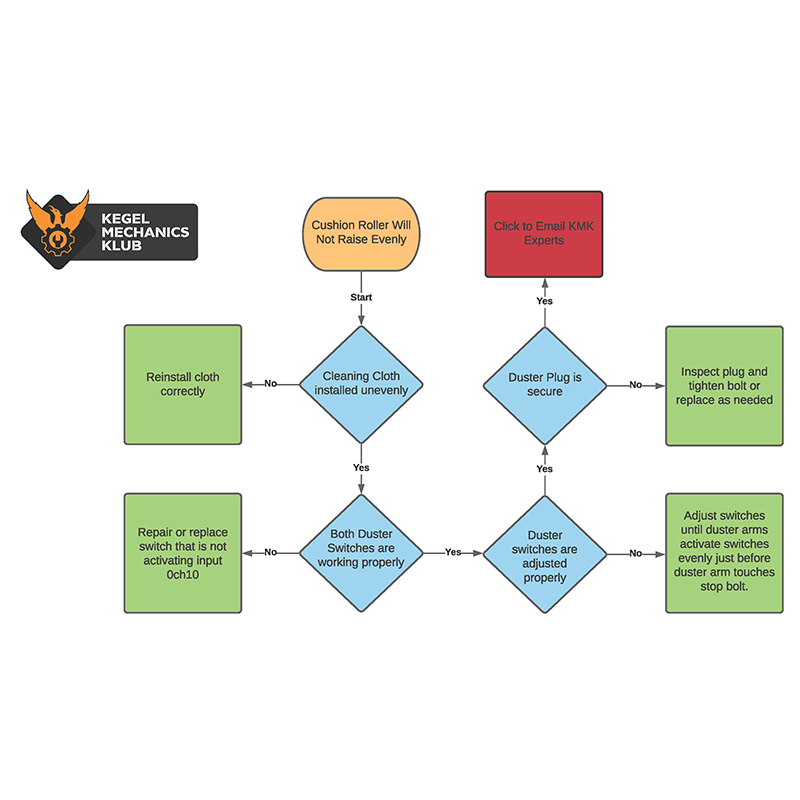
CUSHION ROLLER WILL NOT RAISE EVENLY
more tips, videos, and troubleshooting

Using the interactive flowcharts
Have you seen how awesome these are? Check them out!
Calling all mechanics Submit your tips and tricks!
Have a suggestion for a great tip or trick to be added to our website? We welcome suggestions as we grow the information on this site. Submit your ideas below!